회사에서 기존에 만들어진 어플에 로그인 기능이 없어서 새롭게 추가하게 되었다. 안드로이드 앱은 작게나마 만들어봐서 깊은 지식은 없지만, 이번에 또 한가지 배워가는것 같아 의미가 있었던 작업이다. 처음엔 Retrofit을 사용하지 않고 다른 방법을 사용했는데, 여러가지 정보를 찾아보니 속도나 통신방법 등 Retrofit이 성능적으로 더 좋다는 내용이 있었다.
Retrofit, 웹 서버를 이용한 로그인 만들기 순서
1. 프로젝트 생성
2. Activity화면들 생성(로그인, 결과페이지)
3. 라이브러리 및 환경설정
4. 페이지별 컨트롤러 및 서비스, VO 등 생성
5. 웹 서버 구축(egovFramework 기반의 API 웹 서버 구축)
6. 테스트
로그인 어플리케이션 프로젝트 생성
1. 안드로이드 스튜디오를 통해 로그인 프로젝트를 만든다.


File > New > New Project 메뉴를 선택해 프로젝트 생성을 진행한다. Activity화면을 선택하는 란에서는 로그인 Activity를 선택했다가 새롭게 화면들을 구성하고자 Empty Activity를 선택했고, RetrofitLoginTest 라는 이름으로 프로젝트를 생성했다.
Name : RetrofitLoginTest
Package name : com.example.retrofitlogintest
Language : Java
Minimum SDK : API 16: Android 4.1
Use legacy android.support libraries - check!
로그인 어플리케이션 Activity화면들 생성(로그인, 결과페이지)
▒ 로그인 페이지생성
2. res/layout/activity_main.xml 파일을 로그인 페이지로 수정한다.


activity_main.xml 파일 내, Design탭에서 원하는 로그인 화면을 구성한다. 작성자는 ID,PW입력란과 로그인 버튼을 디자인했다.
각 컴포넌트들의 id와 Constraint Widget, Text를 수정했다.
Component Widget EditText 'ID'
id : editText_id
Constraint Widget : 왼(100), 위(340), 오(100), 아래(10)
Text : 공백
Component Widget EditText 'PW'
id : editText_pw
Constraint Widget : 왼(100), 위(10), 오(100), 아래(10)
Text : 공백
Component Widget Button 'Login'
id : btn_login
Constraint Widget : 왼(160), 위(10), 오(160), 아래(215)
Text : LOGIN
[Activity_main.xml] Source
<?xml version="1.0" encoding="utf-8"?>
<android.support.constraint.ConstraintLayout xmlns:android="http://schemas.android.com/apk/res/android"
    xmlns:app="http://schemas.android.com/apk/res-auto"
    xmlns:tools="http://schemas.android.com/tools"
    android:layout_width="match_parent"
    android:layout_height="match_parent"
    tools:context=".MainActivity">

    <EditText
        android:id="@+id/editText_id"
        android:layout_width="wrap_content"
        android:layout_height="wrap_content"
        android:layout_marginStart="100dp"
        android:layout_marginLeft="100dp"
        android:layout_marginTop="340dp"
        android:layout_marginEnd="100dp"
        android:layout_marginRight="100dp"
        android:layout_marginBottom="10dp"
        android:ems="10"
        android:inputType="textPersonName"
        app:layout_constraintBottom_toTopOf="@+id/editText_pw"
        app:layout_constraintEnd_toEndOf="parent"
        app:layout_constraintStart_toStartOf="parent"
        app:layout_constraintTop_toTopOf="parent" />

    <EditText
        android:id="@+id/editText_pw"
        android:layout_width="wrap_content"
        android:layout_height="wrap_content"
        android:layout_marginStart="100dp"
        android:layout_marginLeft="100dp"
        android:layout_marginTop="10dp"
        android:layout_marginEnd="100dp"
        android:layout_marginRight="100dp"
        android:layout_marginBottom="10dp"
        android:ems="10"
        android:inputType="textPassword"
        app:layout_constraintBottom_toTopOf="@+id/btn_login"
        app:layout_constraintEnd_toEndOf="parent"
        app:layout_constraintStart_toStartOf="parent"
        app:layout_constraintTop_toBottomOf="@+id/editText_id" />

    <Button
        android:id="@+id/btn_login"
        android:layout_width="wrap_content"
        android:layout_height="wrap_content"
        android:layout_marginStart="160dp"
        android:layout_marginLeft="160dp"
        android:layout_marginTop="10dp"
        android:layout_marginEnd="160dp"
        android:layout_marginRight="160dp"
        android:layout_marginBottom="215dp"
        android:text="Button"
        app:layout_constraintBottom_toBottomOf="parent"
        app:layout_constraintEnd_toEndOf="parent"
        app:layout_constraintStart_toStartOf="parent"
        app:layout_constraintTop_toBottomOf="@+id/editText_pw" />
</android.support.constraint.ConstraintLayout>
▒ 로그인 결과 페이지생성
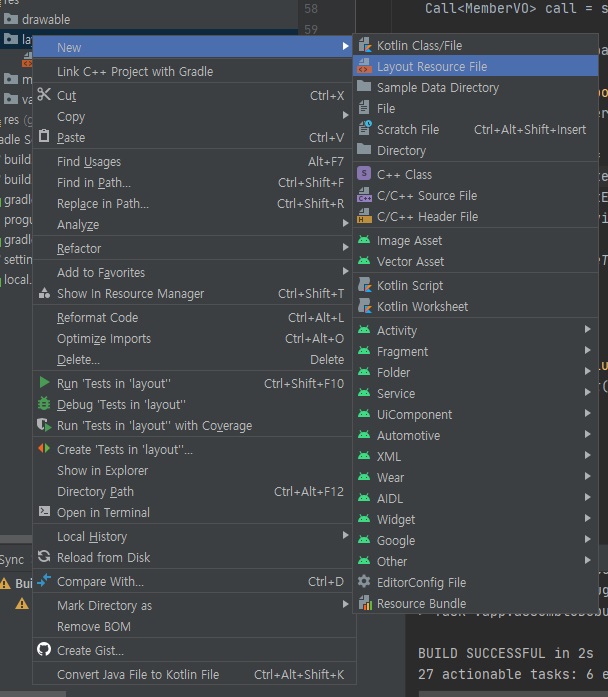
3. activity_result.xml 파일을 새롭게 추가한다.
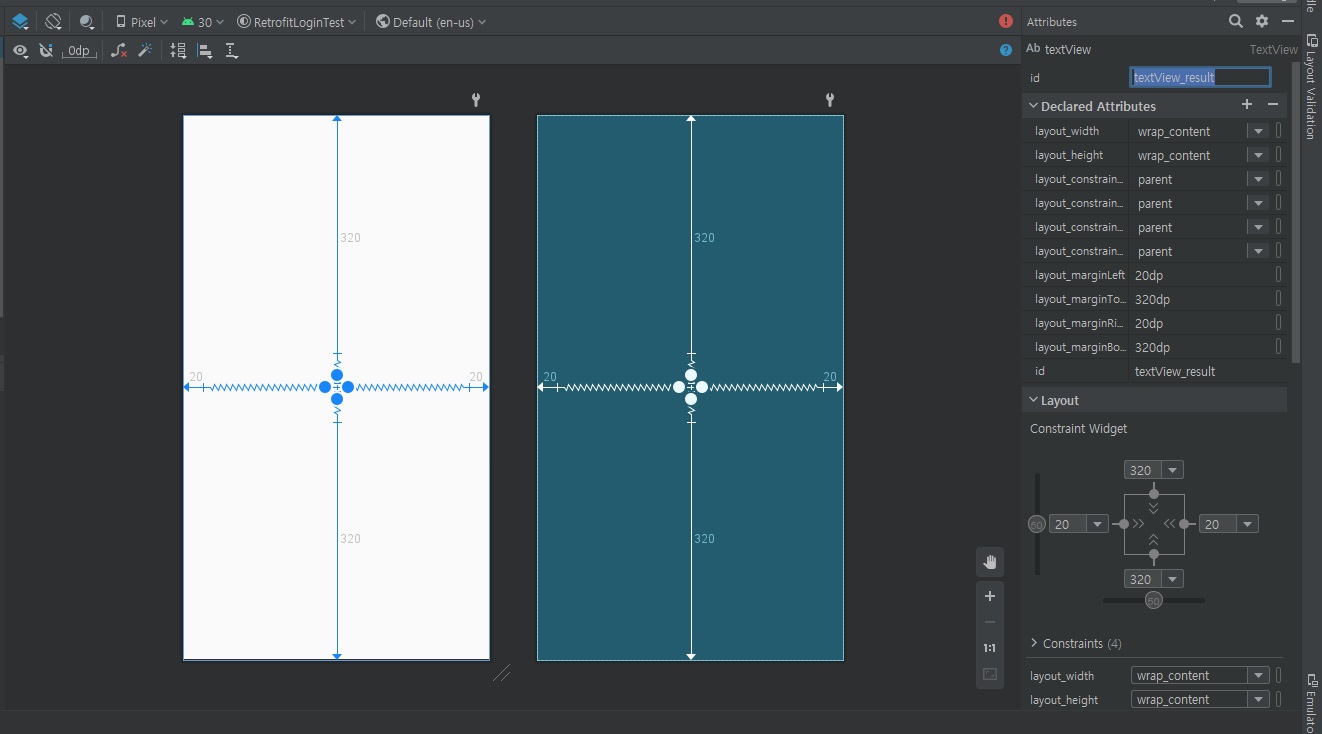
activity_result.xml 파일 내, Design탭에서 원하는 로그인 결과 화면을 구성한다. 작성자는 로그인 후 결과를 확인할 수 있도록 TextView을 디자인했다. 컴포넌트의 id와 Constraint Widget, Text를 수정했다.
Component Widget TextView 'Result'
id : textView_result
Constraint Widget : 왼(20), 위(320), 오(20), 아래(320)
Text : 공백
[Activity_result.xml] Source
<?xml version="1.0" encoding="utf-8"?>
<android.support.constraint.ConstraintLayout xmlns:android="http://schemas.android.com/apk/res/android"
    xmlns:app="http://schemas.android.com/apk/res-auto"
    xmlns:tools="http://schemas.android.com/tools"
    android:layout_width="match_parent"
    android:layout_height="match_parent">

    <TextView
        android:id="@+id/textView_result"
        android:layout_width="wrap_content"
        android:layout_height="wrap_content"
        android:layout_marginStart="20dp"
        android:layout_marginLeft="20dp"
        android:layout_marginTop="320dp"
        android:layout_marginEnd="20dp"
        android:layout_marginRight="20dp"
        android:layout_marginBottom="320dp"
        app:layout_constraintBottom_toBottomOf="parent"
        app:layout_constraintEnd_toEndOf="parent"
        app:layout_constraintStart_toStartOf="parent"
        app:layout_constraintTop_toTopOf="parent" />
</android.support.constraint.ConstraintLayout>
로그인 어플리케이션 라이브러리 및 환경설정
▒ build.gradle
4. build.gradle, AndroidManifest.xml에서 추가 라이브러리 및 설정값을 셋팅한다.
[build.gradle] Source
plugins {
    id 'com.android.application'
}

android {
    compileSdkVersion 30
    buildToolsVersion "30.0.3"

    defaultConfig {
        applicationId "com.example.retrofitlogintest"
        minSdkVersion 16
        targetSdkVersion 30
        versionCode 1
        versionName "1.0"

        testInstrumentationRunner "android.support.test.runner.AndroidJUnitRunner"
    }

    buildTypes {
        release {
            minifyEnabled false
            proguardFiles getDefaultProguardFile('proguard-android-optimize.txt'), 'proguard-rules.pro'
        }
    }
    compileOptions {
        sourceCompatibility JavaVersion.VERSION_1_8
        targetCompatibility JavaVersion.VERSION_1_8
    }
}

dependencies {
    implementation 'com.android.support:appcompat-v7:28.0.0'
    implementation 'com.android.support.constraint:constraint-layout:2.0.4'
    testImplementation 'junit:junit:4.+'
    androidTestImplementation 'com.android.support.test:runner:1.0.2'
    androidTestImplementation 'com.android.support.test.espresso:espresso-core:3.0.2'
    implementation 'com.squareup.retrofit2:retrofit:2.9.0'
    implementation 'com.squareup.retrofit2:converter-gson:2.9.0'
    implementation 'com.squareup.retrofit2:converter-scalars:2.9.0'
}
Retrofit을 이용한 로그인 어플리케이션을 개발하기 위해 필요한 라이브러리 및 컴파일 설정 등등을 설정하기 위해서 build.gradle파일을 추가 및 수정합니다.
▒ AndroidManifest.xml
[AndroidManifest.xml] Source
애플리케이션에서 네트워크 작업을 실행하려면 매니페스트에 다음 권한을 포함해야 한다.
<?xml version="1.0" encoding="utf-8"?>
<manifest xmlns:android="http://schemas.android.com/apk/res/android"
    package="com.example.retrofitlogintest">

    <uses-permission android:name="android.permission.INTERNET" />
    <uses-permission android:name="android.permission.ACCESS_NETWORK_STATE" />

    <application
        android:allowBackup="true"
        android:icon="@mipmap/ic_launcher"
        android:label="@string/app_name"
        android:roundIcon="@mipmap/ic_launcher_round"
        android:supportsRtl="true"
        android:theme="@style/Theme.RetrofitLoginTest"
        android:usesCleartextTraffic="true">
        <activity android:name=".MainActivity">
            <intent-filter>
                <action android:name="android.intent.action.MAIN" />

                <category android:name="android.intent.category.LAUNCHER" />
            </intent-filter>
        </activity>
        <activity android:name=".ResultActivity"/>
    </application>

</manifest>
android.permission.INTERNET, android.permission.ACCESS_NETWORK_STATE를 추가한다.
그리고, 애플리케이션을 개발하면서 발생했던 문제점 중에서, http://와 https://중에서 렉 서버 내, 셋팅된 웹 서버는 http://로 되어 있는데 이 요청이 가능하게 하기 위해서는 android:usesCleartextTraffic="true"설정값이 필요하다는걸 여러가지 검색을 통해서 알게되었다. 그리고 연결된 페이지의 Activity들도 activity 태그를 이용해 추가해주어야 한다.
5. build.gradle에서 추가 라이브러리 및 설정값을 셋팅한다.

프로젝트 전체 내용이다. 페이지와 환경설정 부분이 끝났으니 관련 컨트롤러 및 서비스,VO를 생성하도록 한다. 프로젝트 전체 구조는 위 이미지와 같다.
페이지별 컨트롤러 및 서비스, VO 등 생성
6. MemberVO, ILoginService, MainActivity, ResultActivity 등 생성한다.
데이터를 주고 받을수 있도록 데이터 공간을 만들어준다.
[MemberVO] Source
package com.example.retrofitlogintest.vo;

import android.os.Parcel;
import android.os.Parcelable;

import com.google.gson.annotations.SerializedName;

public class MemberVO implements Parcelable {
    @SerializedName("mem_no")
    private int mem_no;
    @SerializedName("mem_id")
    private String mem_id;
    @SerializedName("mem_pw")
    private String mem_pw;
    @SerializedName("mem_name")
    private String mem_name;

    public MemberVO(String mem_id, String mem_pw){
        this.mem_id = mem_id;
        this.mem_pw = mem_pw;
    }

    public int getMem_no(){
        return mem_no;
    }
    public void setMem_no(int mem_no){
        this.mem_no = mem_no;
    }
    public String getMem_id(){
        return mem_id;
    }
    public void setMem_id(String mem_id){
        this.mem_id = mem_id;
    }
    public String getMem_pw(){
        return mem_pw;
    }
    public void setMem_pw(String mem_pw){
        this.mem_pw = mem_pw;
    }
    public String getMem_name(){
        return mem_name;
    }
    public void setMem_name(String mem_name){
        this.mem_name = mem_name;
    }

    protected MemberVO(Parcel in) {
        mem_no = in.readInt();
        mem_id = in.readString();
        mem_pw = in.readString();
        mem_name = in.readString();
    }

    public static final Creator<MemberVO> CREATOR = new Creator<MemberVO>() {
        @Override
        public MemberVO createFromParcel(Parcel in) {
            return new MemberVO(in);
        }

        @Override
        public MemberVO[] newArray(int size) {
            return new MemberVO[size];
        }
    };

    @Override
    public int describeContents() {
        return 0;
    }

    @Override
    public void writeToParcel(Parcel parcel, int i) {
        parcel.writeInt(mem_no);
        parcel.writeString(mem_id);
        parcel.writeString(mem_pw);
        parcel.writeString(mem_name);
    }
}
implements Parcelable을 설정한 이유는 각각의 Activity로 파라미터를 넘겨줄때 사용하기 위해서다. MemberVO를 생성할때 기본 아이디, 비밀번호를 담아 초기화 할 수 있도록 해주었다.
[ILgoinService] Source
package com.example.retrofitlogintest.login;

import com.example.retrofitlogintest.vo.MemberVO;

import retrofit2.Call;
import retrofit2.http.GET;
import retrofit2.http.Query;

public interface ILoginService {

    @GET("app/getMember.do")
    Call<MemberVO> getMember(@Query("mem_id") String mem_id, @Query("mem_pw") String mem_pw);
}
입력한 아이디와 비밀번호를 통해 DB에 저장되어 있는 회원정보를 가져오기 위한 인터페이스를 생성한다. 쿼리 내 파라미터를 넘기기위해 @Query 어노테이션으로 파라미터명을 셋팅했다.
[MainActivity] Source
package com.example.retrofitlogintest;

import android.content.Intent;
import android.support.v7.app.AppCompatActivity;
import android.os.Bundle;
import android.view.View;
import android.widget.Button;
import android.widget.EditText;
import android.widget.Toast;

import com.example.retrofitlogintest.login.ILoginService;
import com.example.retrofitlogintest.vo.MemberVO;

import retrofit2.Call;
import retrofit2.Callback;
import retrofit2.Response;
import retrofit2.Retrofit;
import retrofit2.converter.gson.GsonConverterFactory;

public class MainActivity extends AppCompatActivity {

    private EditText editTextID ,editTextPW;    // 아이디, 비밀번호 입력창
    private Button btnLogin;                    // 로그인 버튼
    private Retrofit retrofit;                    // 웹서버와 통신할 Retrofit

    @Override
    protected void onCreate(Bundle savedInstanceState) {
        super.onCreate(savedInstanceState);
        setContentView(R.layout.activity_main);
        setTitle("Retrofit Login");

        setRetrofitInit();  // Retrofit 초기화

        editTextID = findViewById(R.id.editText_id);
        editTextPW = findViewById(R.id.editText_pw);
        btnLogin = findViewById(R.id.btn_login);

        btnLogin.setOnClickListener(new View.OnClickListener() {
            @Override
            public void onClick(View view) {
                login();    // 버튼 클릭시, 로그인을 진행합니다.
            }
        });
    }

    private void setRetrofitInit(){
        retrofit = new Retrofit.Builder()
                .baseUrl("http://192.168.0.105:8081")
                .addConverterFactory(GsonConverterFactory.create())
                .build();
    }

    private void login(){
        String id = editTextID.getText().toString();
        String pw = editTextPW.getText().toString();

        ILoginService service = retrofit.create(ILoginService.class);
        Call<MemberVO> call = service.getMember(id, pw);

        call.enqueue(new Callback<MemberVO>() {
            @Override
            public void onResponse(Call<MemberVO> call, Response<MemberVO> response) {
                MemberVO memberVO = response.body();    // 웹서버로부터 응답받은 데이터가 들어있다.

                if(memberVO != null){       // 회원입니다.
                    Intent intent = new Intent(getApplicationContext(), ResultActivity.class);
                    intent.putExtra("memberVO", memberVO);
                    startActivity(intent);
                }else{                      // 회원이 아닙니다.
                    Toast.makeText(getApplicationContext(), "회원이 아닙니다!", Toast.LENGTH_SHORT).show();
                }
            }

            @Override
            public void onFailure(Call<MemberVO> call, Throwable t) {
                Toast.makeText(getApplicationContext(), "로그인에 실패하였습니다!", Toast.LENGTH_SHORT).show();
            }
        });
    }
}
[ResultActivity] Source
package com.example.retrofitlogintest;

import android.content.Intent;
import android.os.Bundle;
import android.support.v7.app.AppCompatActivity;
import android.view.View;
import android.widget.TextView;

import com.example.retrofitlogintest.vo.MemberVO;

public class ResultActivity extends AppCompatActivity {

    private TextView textView_result;       // 결과

    @Override
    protected void onCreate(Bundle savedInstanceState) {
        super.onCreate(savedInstanceState);
        setContentView(R.layout.activity_result);
        setTitle("Result");

        textView_result = findViewById(R.id.textView_result);

        Intent intent = getIntent();        // 로그인 시, 넘겨받은 파라미터를 받는다.
        MemberVO memberVO = intent.getParcelableExtra("memberVO");

        textView_result.setText(memberVO.getMem_name() + "님! 반갑습니다!");
    }

}
[애플리케이션 실행 결과]

웹 서버 구축(egovFramework 기반의 API 웹 서버 구축)
7. egovframework 기반의 웹서버 구축은 게시글 링크로 대신한다.
[웹 서버 링크가 들어갈 자리]웹 서버 링크는 곧 게시글 작성 후 빠른 시일내로 업로드 하도록 하겠습니다!
[Andriod] 안드로이드 Retrofit, 웹서버를 이용한 로그인 만들기
@Junesker
'DEVELOPMENT > Android' 카테고리의 다른 글
| [Andriod] 구글 플레이스토어 앱 등록 및 출시 방법 (22) | 2021.07.12 |
|---|---|
| [Andriod] 안드로이드 홈 버튼 효과 만들기 (0) | 2021.06.24 |
| [Andriod] 안드로이드 스튜디오(Andriod Studio) APK 추출 방법(Create key) (0) | 2021.06.09 |
| [Andriod] 안드로이드 스튜디오(Andriod Studio) APK 추출 방법(기존 key사용) (0) | 2021.06.03 |
| [Andriod] 안드로이드 스튜디오(Andriod Studio) 설치 방법 (0) | 2021.05.25 |